(This guide applies to any Debian/Ubuntu based distribution)
For some reason (complexity perhaps) it is not possible to configure full-disk encryption and LVM from the graphical installer in the desktop edition. It is possible to select full-disk encryption but this only creates one filesystem (root).
I want to use LVM to allow me to have more than one filesystem without having to enter more than one password during boot-up. It is not impossible to install Ubuntu desktop (or Linux Mint as in this guide) with encryption and LVM but it does require a little more work.
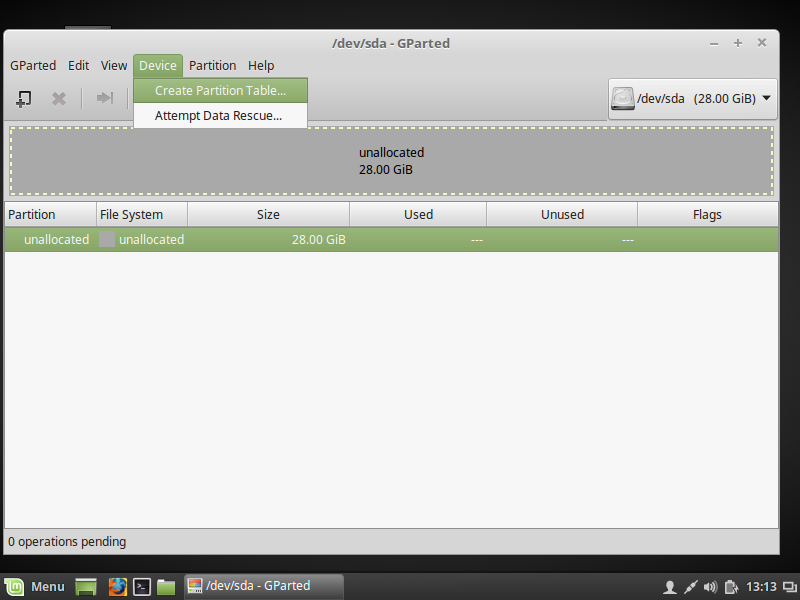
Before starting the installation, we need to prepare the harddisk. Start up GParted (as this is the easiest to work with, if you feel adventurous it can be done in parted or fdisk as well).
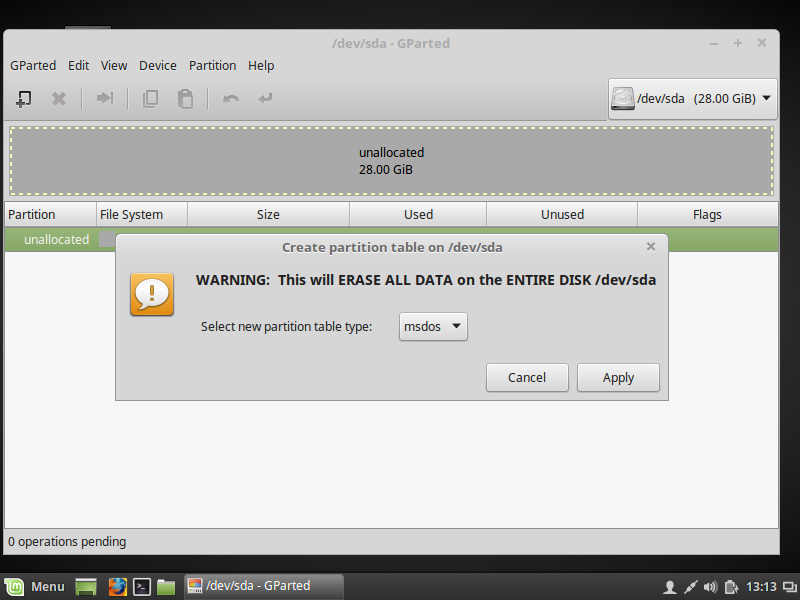
Start by creating a new partition table if needed (if you want to start over or the disk is empty)
Of course this will destory any data already on the disk, you may want to resize any existing partitions (Windows for instance) instead.
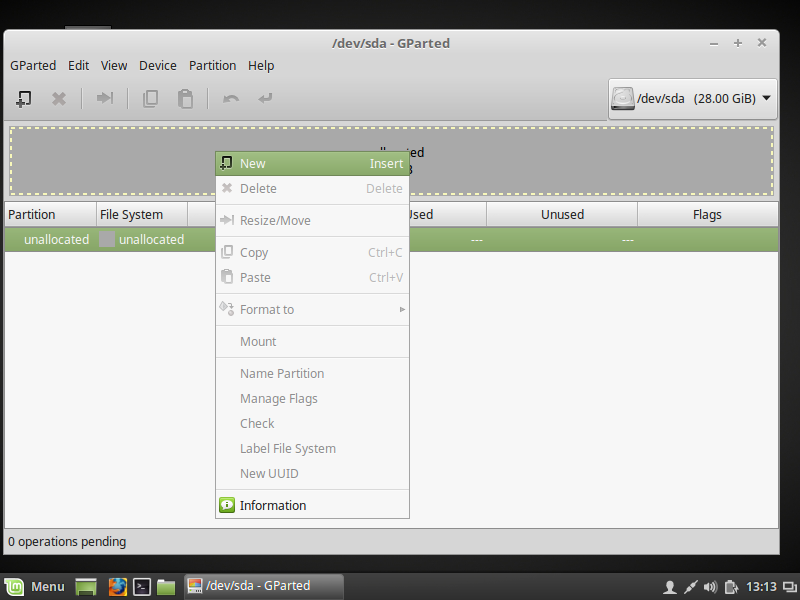
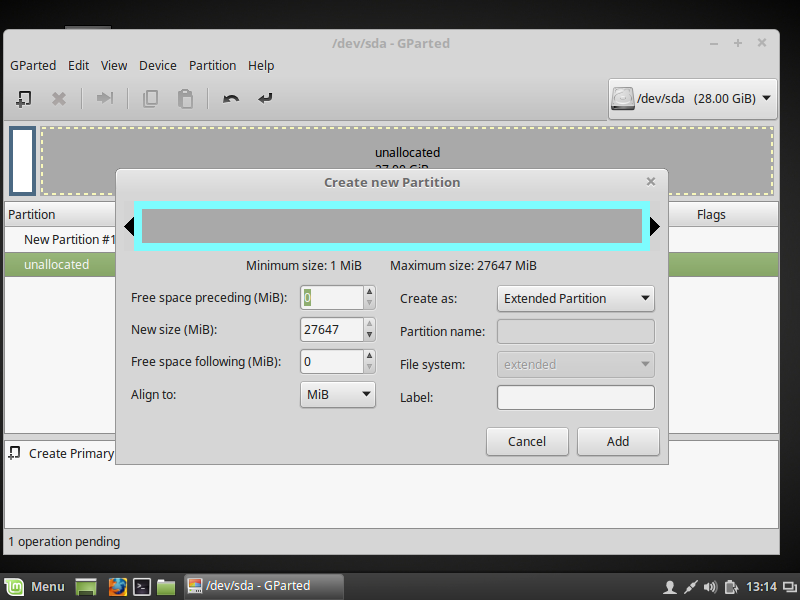
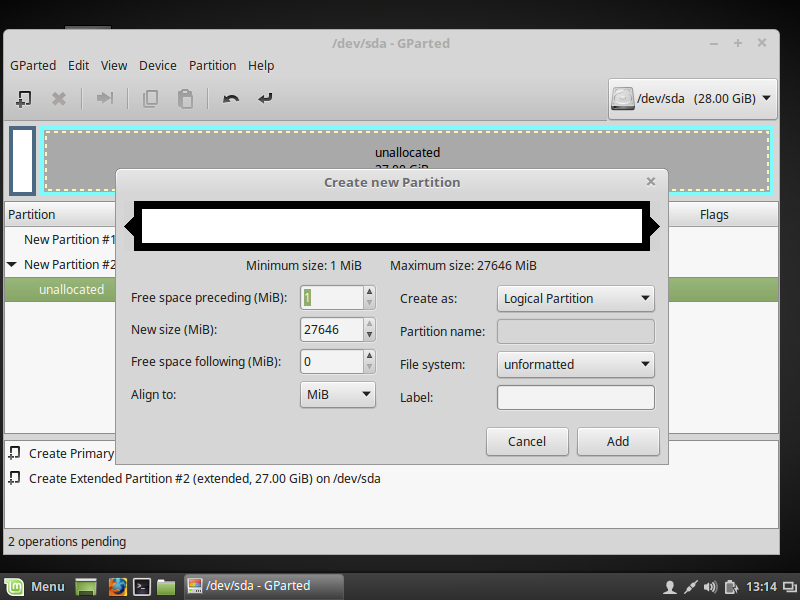
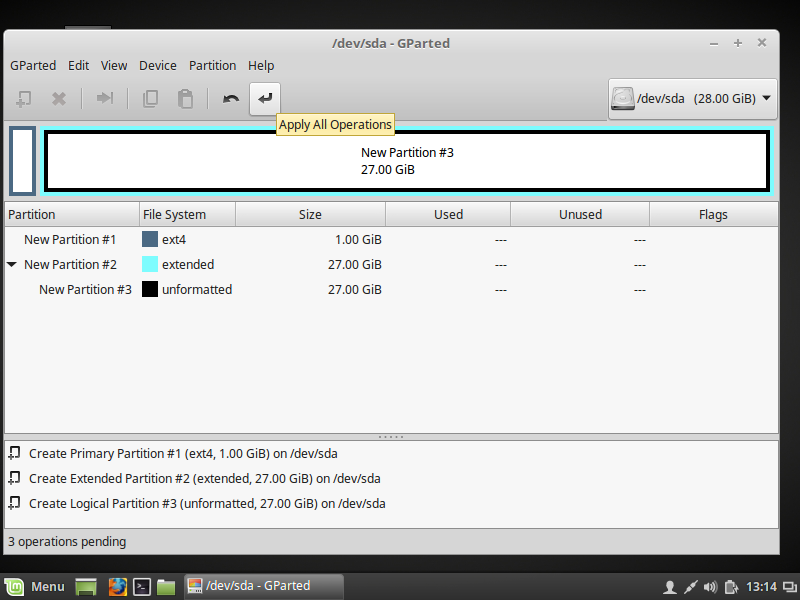
Next, create three new partitions
First, the /boot partition
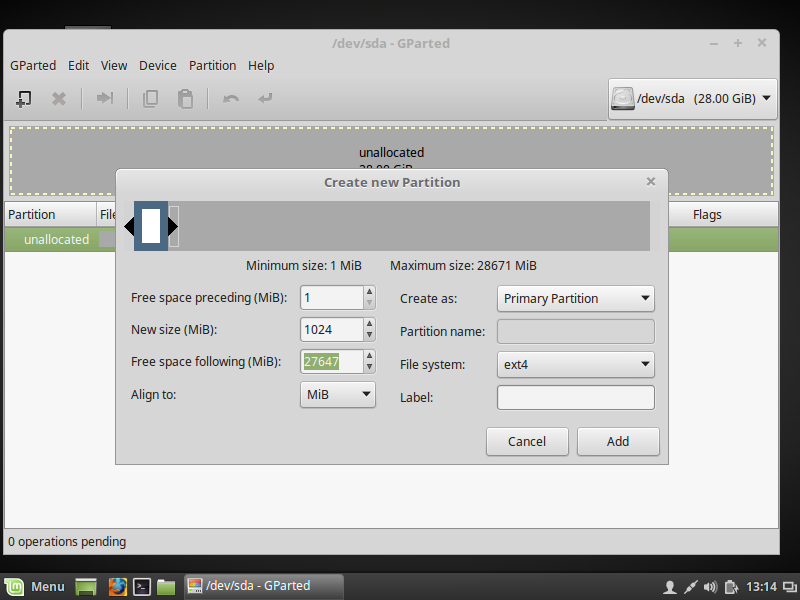
Second, create an extended partition
Lastly, the partition which will hold the encrypted data
Now, apply the configuration
Now exit GParted and then start a terminal and sudo su -
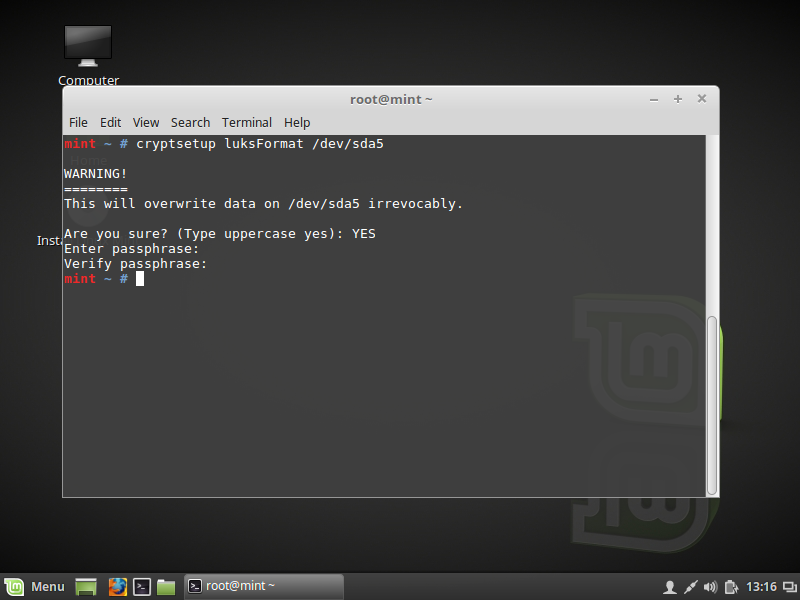
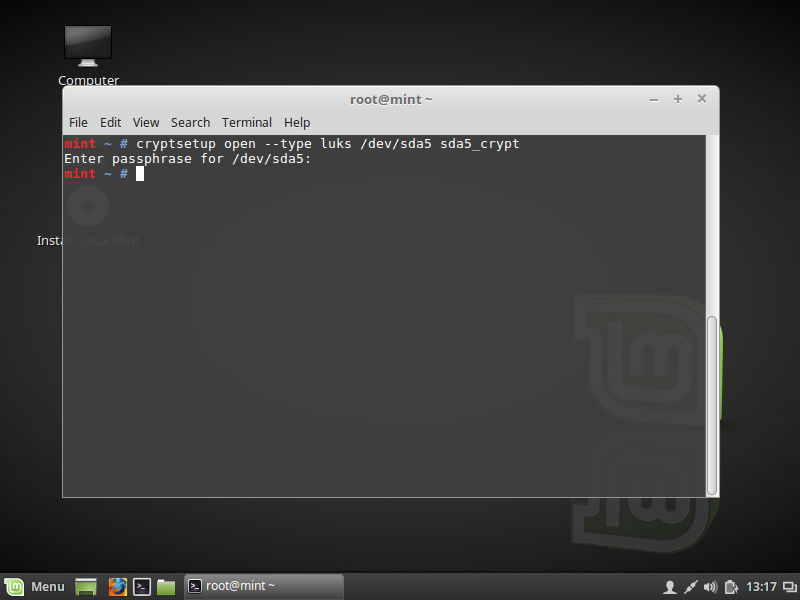
First, create the encrypted partition (you need to double check the device names). Needless to say, you need to pick a good password.
# cryptsetup luksFormat /dev/sda5
Open (activate) the encrypted container/partition
# cryptsetup open --type luks /dev/sda5 sda5_crypt
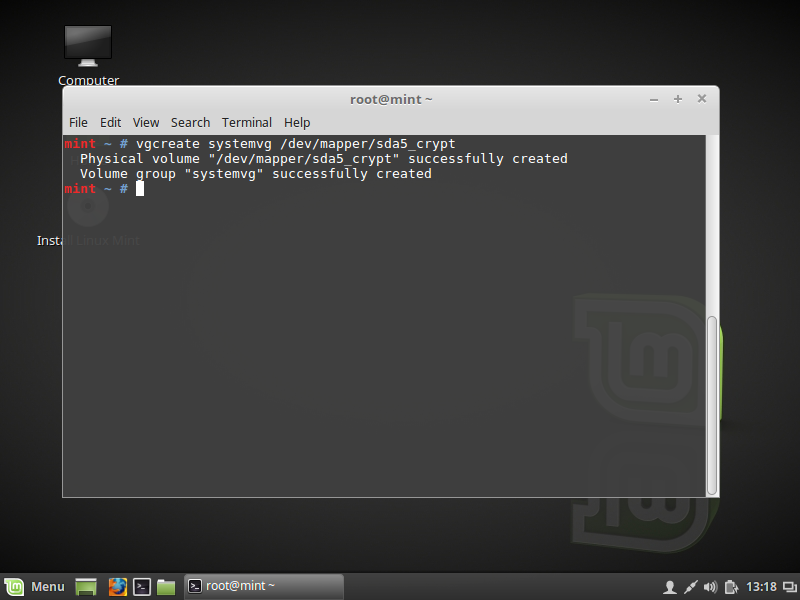
Create the volume group on the container
# vgcreate systemvg /dev/mapper/sda5_crypt
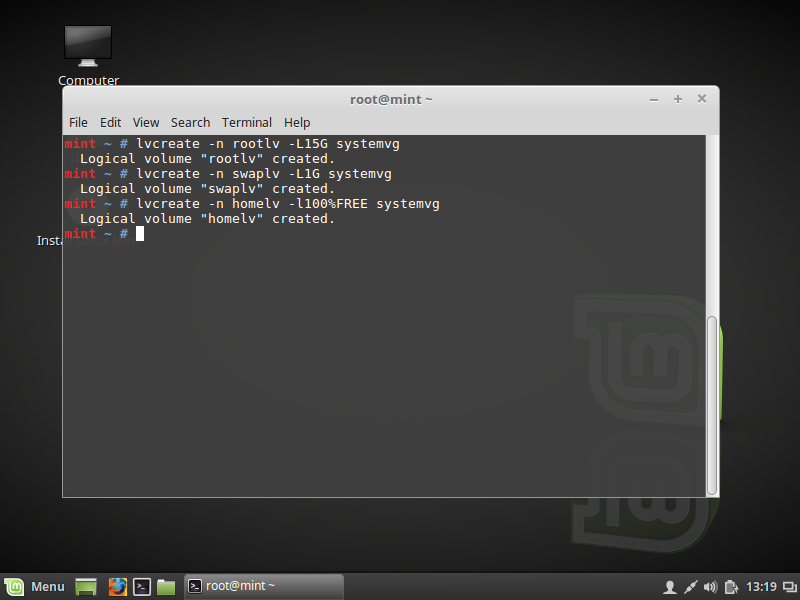
Final step in the terminal is to create the logical volumes - I’ve opted for three: /, /home and swap (having a separate /home makes reinstalling easier).
# lvcreate -n rootlv -L20G systemvg
# lvcreate -n swaplv -L8G systemvg
# lvcreate -n homelv -l100%FREE systemvg
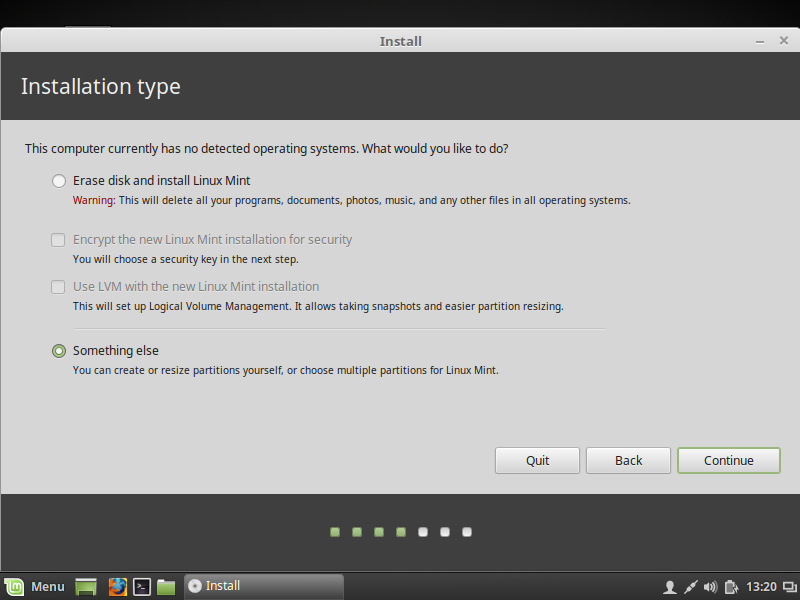
Next, start up the Installer and answer the questions until you get to the screen where to decide the way to install Ubuntu/Mint. Select Something else
Now, select the filesystems to create, they should be configured like so:
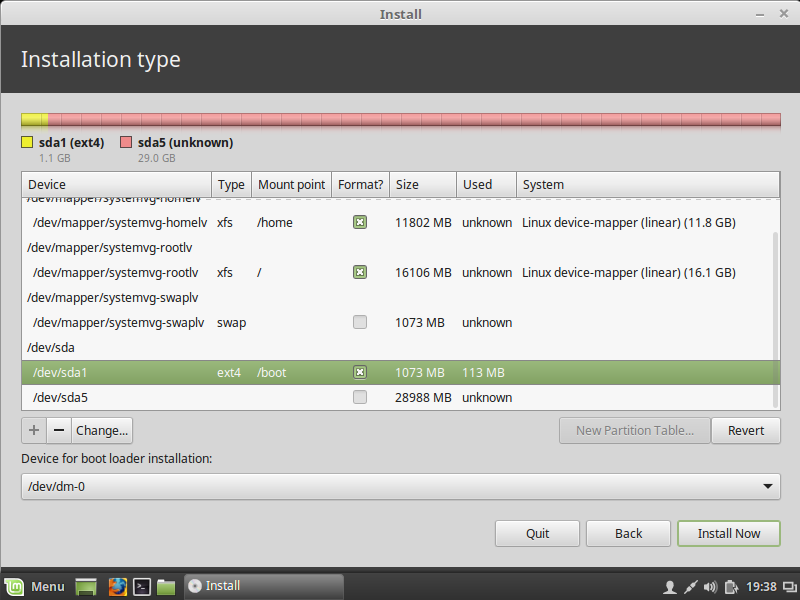
It is also important to select the correct device for bootloader installation. It should NOT be installed to /dev/dm-0
Accept the changes
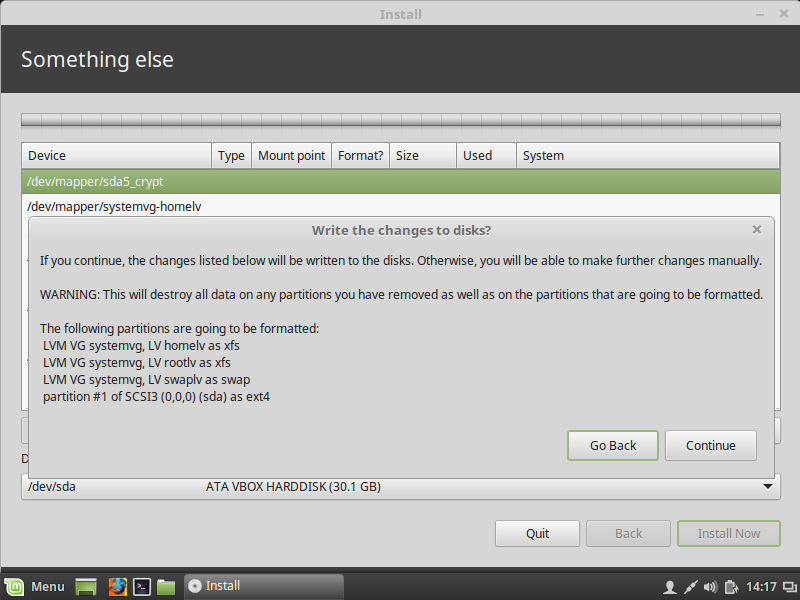
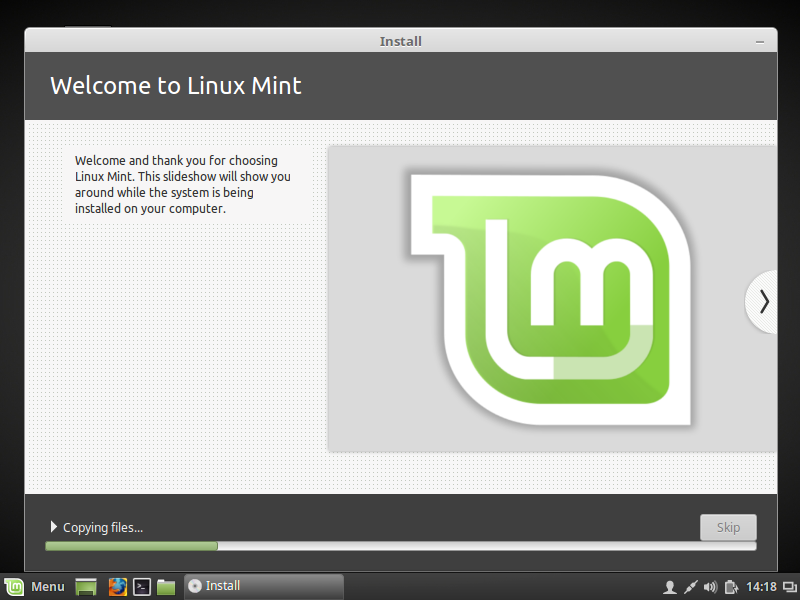
And continue to installation.
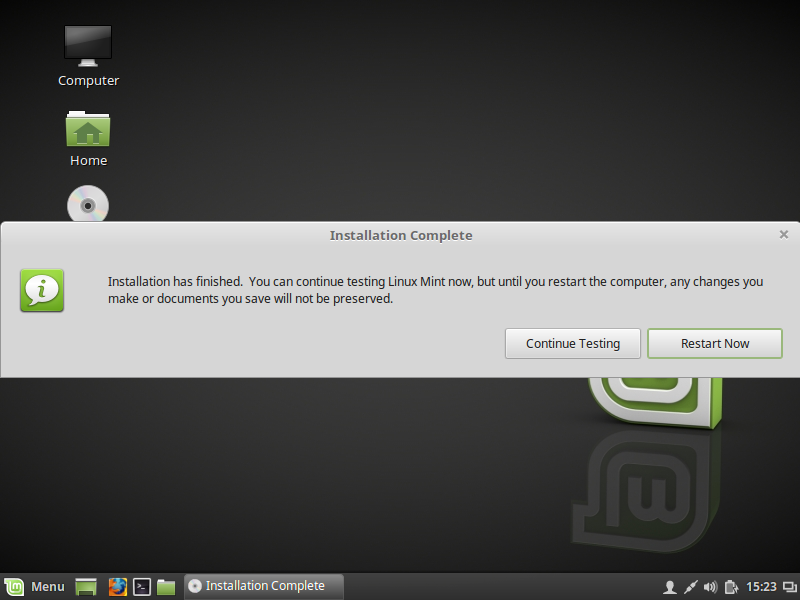
When the installation is done, do not reboot.
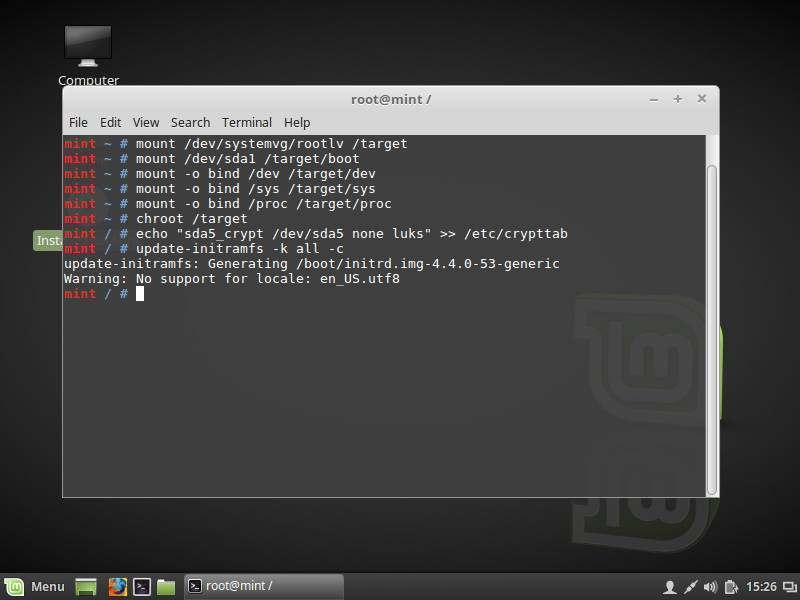
Go back to the terminal and setup a chroot with your new installation
# mount /dev/systemvg/rootlv /target
# mount /dev/sda1 /target/boot
# mount -o bind /proc /target/proc
# mount -o bind /dev /target/dev
# mount -o bind /sys /target/sys
# chroot /target
Last steps are to let your installation know you are using an encrypted root partition and re-generate the ramdisk used for booting
# echo "sda5_crypt /dev/sda5 none luks" >> /etc/crypttab
# update-initramfs -k all -c
The line in crypttab may also use UUID (to prevent problems if your device names change)
# blkid /dev/sda5
# echo "cryptodisk UUID=63a28f07-6f16-4b00-93a1-1c95614efafb none luks" >> /etc/crypttab
63a28f07-6f16-4b00-93a1-1c95614efafb is the UUID of the disk.
Now exit the chroot (press CTRL-D or type exit) and then reboot.